Part 1 is here
Part 2 is here
First things first I grab the camera, make sure I have batteries and my memory card. I can’t count the amount of times I didn’t do this first and I regretted not being able to write a tutorial or share my project with you guys. If I plan on blogging the project I set up my little ‘studio’ (if you knew how ridiculous this sentence was you would laugh until you pee, more on this later) so I can take pictures of the pieces as I set up.
 |
| If I really like a specific piece of paper I always save the bar code strip so I can find it again |
1. Choose all my papers and embellishments
2. Punch, die cut, slice and score any elements I need
(I always make 4 extra of anything I need, in case of bad stamped images, spills or just plain losing something)
3. Stamp EVERYTHING, images, sentiments what have you
(as we know I do not always follow this advice, trust me STAMP FIRST)
4. Color, glitter, paint whatever might need to dry for a while
(If I have parts that will need Tim Holtz Crackle Paint I would have done those first since they take a very long time to dry and crack up properly)
5. Distress and/or Ink any edges that require a pop of color
6. Cut out stamped images and sentiments
7. Organize materials in a line at the top of your work area in the order you will use them
8. Adhere pop dots to dimensional pieces
 |
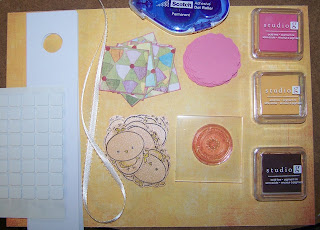
| I rarely lay out my pieces so neatly with coordinating paper as a buffer, this is how you know I staged the shot |
 |
| Sewing up sections of a banner is the same as any other multiple project, the only difference is that they create one big masterpiece in the end... |
This is not the norm; usually these steps are a few nights in the making. Sometimes I make a bunch of templates when I am feeling crafty, not really knowing what the occasion will be to use them. If I have a specific project in mind (like favors for a holiday) I might start a few weeks ahead and do a little here and there (stamp and cut one night, paint or die cut another night), storing the pieces in clear plastic shoe holders labeled with the project name on top (I just use masking tape so when the project is done I can peel it off and reuse the container for another WIP).
I would really love to hear about everyone's process. Where do you get your ideas? Do you like to make multiples or all one of a kind projects?


No comments:
Post a Comment